
An outdoor shower is a practical addition to a backyard, pool area, beach house, or garden. It makes it easy to rinse off after swimming, remove sand and dirt before entering the house, or simply enjoy a refreshing shower outdoors.
The good news is that installing an outdoor shower fixture can be a manageable DIY project if you already have access to a suitable water supply.
However, the installation involves more than simply attaching a showerhead to a wall. You also need to consider plumbing, water pressure, drainage, weather exposure, mounting surfaces, and local plumbing requirements.
Table of Contents
This guide explains how to install an outdoor shower fixture from planning and preparation through testing and maintenance.
What Is an Outdoor Shower Fixture?
An outdoor shower fixture is the hardware that controls and delivers water for an exterior shower. Depending on the design, it may include a shower valve, handles, showerhead, hand shower, supply connections, and mounting hardware.
Outdoor shower systems generally fall into two categories: cold-water-only systems and hot-and-cold systems.
A cold-water shower is simpler to install and can often connect directly to an existing outdoor water line. A hot-and-cold outdoor shower requires both hot and cold water supplies or a specialized outdoor shower system.
Some outdoor shower fixtures are designed to mount directly to an exterior wall, while freestanding models can be installed on a post, enclosure, or dedicated shower structure.
Before You Install an Outdoor Shower
Before buying the fixture or cutting into plumbing, determine where the shower will go and how water will reach it.
The ideal location should have convenient access to a water supply and an appropriate drainage solution. If possible, choose an area where water can drain naturally without collecting near the foundation of your home.
You should also consider privacy, sunlight, accessibility, and exposure to freezing temperatures.
If you’re installing the shower near a swimming pool, placing it between the pool and the house can make it especially convenient for rinsing off before going indoors.
Check Your Local Plumbing Requirements
Before beginning the installation, check local building and plumbing requirements.
Outdoor plumbing can be subject to regulations involving backflow prevention, drainage, potable water connections, anti-scald protection, and wastewater disposal.
Some locations may also require a permit, particularly if you’re installing new water lines or connecting the shower to the home’s plumbing system.
If you’re unsure about the requirements or need to modify the home’s main plumbing, consulting a licensed plumber is a good idea.
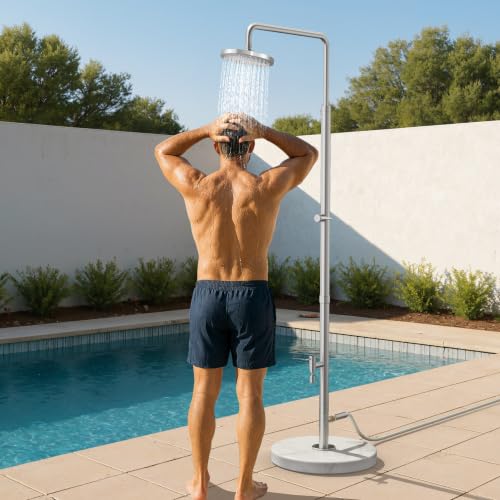
- Weighted Marble Base for Superior Stability: At 38 lbs, the natural stone base stays firmly planted—even when hit by backyard hose spray or summer wind gusts. Unlike hollow plastic bases that need to be filled with water (and still wobble), ours won’t tip, even on uneven ground
Tools and Materials You’ll Need
The exact materials depend on the outdoor shower fixture and your existing plumbing.
Common tools and supplies include an adjustable wrench, pipe wrench, screwdriver, drill, level, measuring tape, plumber’s tape or approved thread sealant, drill bits, pipe fittings, shutoff valves, mounting hardware, and appropriate outdoor-rated plumbing components.
For a hot-and-cold installation, you’ll also need suitable hot and cold water supply lines and a compatible shower valve.
The mounting surface may require additional materials such as treated lumber, masonry anchors, or exterior-rated fasteners.
Step 1: Choose the Shower Location
Start by selecting a suitable location for the outdoor shower.
Look for a solid mounting surface and convenient access to water.
If you’re mounting the shower fixture to an exterior wall, verify that the wall can support the fixture and that you know where the plumbing can be routed.
For a freestanding shower, you’ll need a sturdy post or dedicated shower structure.
Keep the showerhead at a comfortable height. A common installation height is approximately 72–80 inches (183–203 cm) above the finished shower floor, although the ideal height depends on the users and the fixture.
Before drilling or cutting anything, mark the fixture position and verify that the shower will be comfortable to use.
Step 2: Plan the Water Supply
Determine whether you’re connecting the shower to an existing outdoor water line or extending plumbing from inside the house.
For a cold-water-only shower, you generally need a single water supply.
For a hot-and-cold shower, you’ll need separate hot and cold supplies.
The pipe size should match the requirements of the shower fixture and the available water pressure. Follow the manufacturer’s specifications rather than assuming that a particular pipe size will always be appropriate.
A dedicated shutoff valve is also highly recommended. It allows you to isolate the outdoor shower without shutting off water to the entire house.
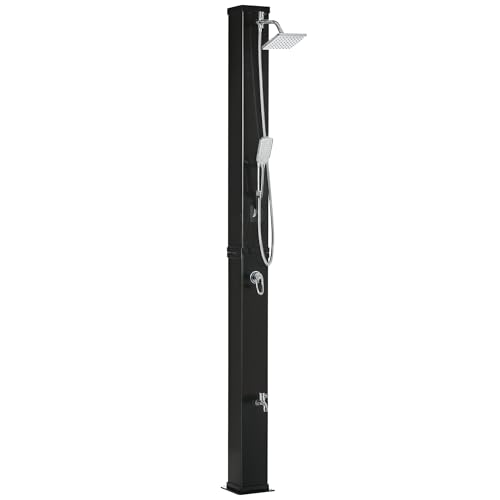
- Solar Powdered: This freestanding heated outdoor shower uses solar energy to heat the water. The perfect design can trap the heat inside a 10.6 gallon tank for a longer time and can raise the water temperature up to 60℃/140°F.
Step 3: Shut Off the Water
Before modifying any plumbing, shut off the appropriate water supply.
Open a nearby faucet to release pressure from the line and make sure the water has stopped flowing before disconnecting or cutting any pipe.
If you’re working on a hot-and-cold system, make sure both supplies are safely isolated.
Never begin cutting into a pressurized water line.
Step 4: Install the Water Supply Lines
Route the water supply lines from the existing plumbing to the shower location.
The exact installation method depends on the type of plumbing in your home. Copper, PEX, CPVC, and other systems require different fittings and installation techniques.
For outdoor installations, use components that are appropriate for exterior exposure and protect vulnerable plumbing from physical damage.
If pipes will run through an exterior wall, seal the penetration properly to prevent water from entering the wall cavity.
The supply lines should terminate at the correct locations for the shower valve.
Step 5: Install a Shutoff Valve
Installing a shutoff valve near the outdoor shower is one of the most useful additions you can make.
It allows you to turn the shower off when it’s not being used and makes future maintenance much easier.
For seasonal climates, the shutoff valve can also be part of a winterization system that allows the outdoor plumbing to be drained before freezing weather arrives.
For maximum convenience, position the valve somewhere accessible but protected from accidental damage.
Step 6: Mount the Shower Valve
Follow the manufacturer’s instructions for positioning and mounting the shower valve.
The valve must be installed securely and at the correct depth relative to the finished wall or mounting surface.
Use a level to ensure the valve is straight.
For a hot-and-cold fixture, make sure the hot and cold supplies are connected to the correct sides of the valve. Reversing the connections can cause the controls to operate incorrectly.
Do not rely solely on thread sealant to compensate for poorly aligned or unsupported plumbing.
Step 7: Connect the Showerhead
Once the valve and supply plumbing are installed, connect the shower arm and showerhead according to the manufacturer’s instructions.
Use an appropriate thread sealant on threaded connections where required. Plumber’s tape is commonly used on tapered pipe threads, but it should not be applied indiscriminately to every type of fitting.
Tighten threaded connections securely, but avoid overtightening, which can damage fittings.
Position the showerhead so that water flows toward the intended shower area rather than toward the exterior wall or nearby structures.
Step 8: Install the Fixture Trim and Handles
With the plumbing connected, install the exterior trim, handles, escutcheon, and other components supplied with the fixture.
Make sure all components are properly seated and aligned.
If the fixture includes separate hot and cold handles, check that each handle corresponds to the correct water supply.
Some modern outdoor shower fixtures use a single thermostatic or pressure-balancing control, which can provide better temperature regulation.
Step 9: Test for Leaks
Slowly turn the water supply back on.
Inspect every connection carefully.
Check the supply lines, valve connections, shower arm, and showerhead for leaks.
Let the system remain pressurized for several minutes and inspect the connections again.
Even a small leak can become a significant problem when an outdoor shower is used regularly.
If you find a leak, shut off the water before attempting to tighten or repair the connection.
Step 10: Test Water Pressure and Temperature
Turn on the shower and check the water flow.
A properly installed fixture should produce consistent water flow without excessive pressure fluctuations.
For a hot-and-cold shower, adjust the temperature gradually and verify that the controls operate correctly.
If the water is too hot or difficult to regulate, check the shower valve settings and manufacturer’s instructions.
Anti-scald protection is particularly important for showers that will be used by children or other vulnerable users.
What About Outdoor Shower Drainage?
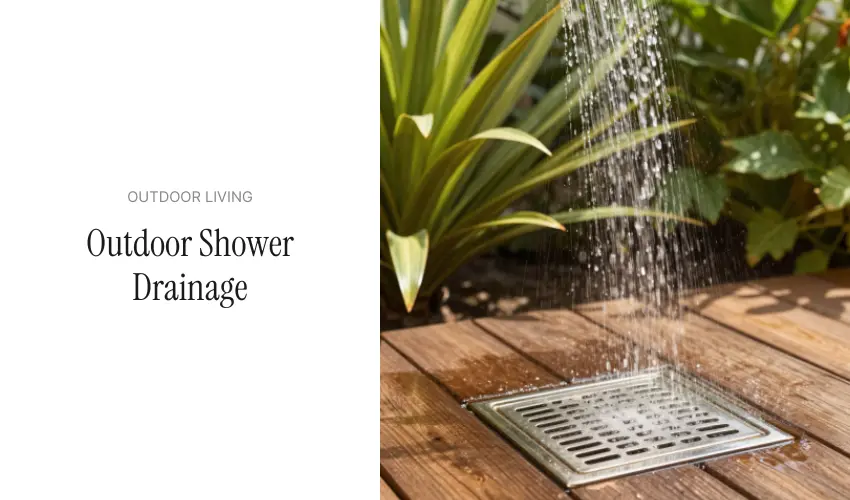
Drainage is one of the most important parts of an outdoor shower installation.
Unlike an indoor shower, an outdoor shower may not need a conventional enclosed drain in every situation. However, you still need a plan for where the wastewater will go.
Depending on local regulations and site conditions, options may include a gravel drainage area, a dedicated outdoor drain, a dry well, or connection to an approved drainage system.
Do not simply assume that wastewater can be discharged anywhere on your property.
Soap, shampoo, and other products can affect soil and vegetation, while poorly controlled water can create standing water, erosion, or moisture problems around your home’s foundation.
A properly designed drainage system should direct water away from buildings and areas where it could cause damage.
How to Install an Outdoor Shower on Concrete
Concrete provides a solid base for an outdoor shower, but you’ll need appropriate anchors and mounting hardware.
If you’re installing a freestanding fixture, the post or base should be securely anchored to the concrete.
If you’re routing plumbing through or beneath the concrete, planning becomes more complicated because cutting or drilling the slab may be necessary.
Before drilling into concrete, make sure you know where existing plumbing, electrical wiring, or other utilities are located.
For major plumbing modifications beneath a slab, professional installation may be the safest option.
How to Install an Outdoor Shower on a Wood Wall
A wood wall can provide a straightforward mounting surface, provided it is structurally sound.
Use exterior-rated fasteners that can withstand moisture exposure.
If the wall is made from siding rather than structural material, make sure the fixture is properly supported instead of attaching heavy components only to the siding.
All penetrations should be sealed appropriately with an exterior-rated sealant or flashing system to reduce the risk of water intrusion.
How to Install an Outdoor Shower on a Brick or Masonry Wall
Masonry requires appropriate anchors and drilling equipment.
Use masonry-rated anchors designed for the expected load and outdoor conditions.
Avoid placing excessive stress on bricks, mortar joints, or fragile masonry.
If the installation requires significant structural modification, consult a professional to ensure the mounting system is secure.
Hot vs. Cold Outdoor Showers
A cold-water outdoor shower is usually the simplest option.
It requires only one water supply and generally has fewer components.
A hot-and-cold shower provides greater comfort, especially in cooler weather, but installation is more involved because it requires hot and cold water connections.
If you’re installing an outdoor shower primarily for rinsing after swimming, a cold-water fixture may be sufficient.
If you expect to use the shower frequently or throughout the year, a hot-and-cold system may be worth the additional installation effort.
How to Winterize an Outdoor Shower
If you live in an area where temperatures can fall below freezing, winterization is essential.
Water trapped inside outdoor plumbing can freeze, expand, and damage pipes, valves, and fittings.
Before freezing weather arrives, shut off the outdoor shower’s water supply and drain the plumbing.
If the system has dedicated drain or blowout points, use them according to the manufacturer’s instructions.
Some installations may require compressed air to remove trapped water, but this should only be done using the correct pressure and procedure for the plumbing system.
Simply turning off the water may not be enough if water remains trapped inside the pipes.
How to Prevent Outdoor Shower Damage
Outdoor fixtures are exposed to sunlight, rain, humidity, temperature changes, and potentially freezing conditions.
Choose fixtures designed for exterior use and use corrosion-resistant hardware where appropriate.
Regularly inspect connections for leaks, check seals for deterioration, and clean mineral deposits from the showerhead.
If the shower won’t be used for an extended period, particularly during winter, shut off and drain the system when appropriate.
Common Outdoor Shower Installation Mistakes
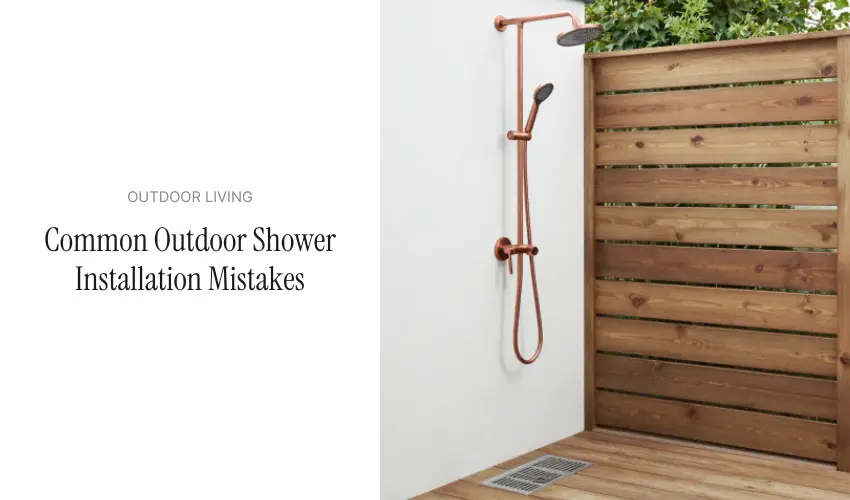
One of the most common mistakes is failing to plan drainage before installing the water supply.
Another is mounting the fixture to a surface that isn’t strong enough to support it.
Incorrectly connected hot and cold water lines can also cause problems, as can insufficient sealing around exterior wall penetrations.
Some DIY installations also overlook freezing conditions. Outdoor plumbing that isn’t properly winterized can suffer serious damage when temperatures drop.
Finally, avoid choosing a location solely based on convenience. The best location needs to balance water access, drainage, privacy, structural support, and long-term maintenance.
How Much Does It Cost to Install an Outdoor Shower?
The cost varies significantly depending on the type of shower and how much plumbing work is required.
A simple cold-water fixture connected to an existing outdoor supply can be relatively inexpensive.
A permanent hot-and-cold shower with a dedicated structure, drainage system, and new plumbing can cost substantially more.
The largest cost factors usually include the shower fixture, plumbing materials, labor, drainage, mounting structure, and any required permits.
If you’re hiring a plumber, ask for a complete estimate before work begins.
DIY vs. Professional Installation
A basic outdoor shower installation can be a reasonable DIY project for someone comfortable with plumbing and construction.
However, professional installation is recommended when the project involves significant changes to your home’s plumbing, complicated drainage, electrical systems, underground utilities, or local permit requirements.
Water damage can be expensive to repair, so saving money on installation isn’t worthwhile if an inexperienced connection causes a leak inside a wall or foundation.
Final Thoughts
Installing an outdoor shower fixture can be a great way to make a pool area, backyard, beach property, or outdoor living space more convenient.
The fixture itself is only one part of the project. A successful installation requires careful planning around the water supply, mounting surface, drainage, water pressure, temperature control, and weather conditions.
For a simple cold-water setup, the installation can be relatively straightforward. A permanent hot-and-cold shower or a system requiring new plumbing and drainage is more complex and may be better handled by a professional.
Most importantly, plan the entire system before you start. Choose the location carefully, use outdoor-rated components, test every connection for leaks, and make sure the wastewater has a safe and legal destination.
With the right preparation, a well-installed outdoor shower can provide years of convenient and refreshing outdoor use.
Frequently Asked Questions
Can I install an outdoor shower myself?
Yes, a basic outdoor shower can often be installed as a DIY project if you have suitable plumbing access and understand the requirements. More complex installations may require a licensed plumber.
Do outdoor showers need a drain?
Not always, but every outdoor shower needs an appropriate plan for managing wastewater. Local regulations and site conditions determine what type of drainage is acceptable.
Can I connect an outdoor shower to a garden hose?
Some portable outdoor showers are specifically designed for hose connections. A permanent fixture should generally use an appropriately installed plumbing connection rather than an improvised hose setup.
How high should an outdoor showerhead be?
A typical showerhead installation is around 72–80 inches (183–203 cm) above the finished shower floor. The ideal height depends on the fixture and the people using the shower.
Can an outdoor shower have hot water?
Yes. A hot-and-cold outdoor shower can be connected to an appropriate hot water supply and a shower valve. Some systems also use specialized outdoor heating solutions.
How do I protect an outdoor shower from freezing?
Shut off the water supply and drain the outdoor plumbing before freezing temperatures arrive. Depending on the system, additional winterization may be necessary.
Can an outdoor shower be installed against a house?
Yes. Many outdoor showers are mounted to exterior walls. However, the wall must provide adequate structural support, and plumbing penetrations must be properly sealed to prevent water intrusion.