
When it comes to revitalizing your bathroom, one of the most overlooked yet impactful upgrades is painting your shower floor.
Whether you’re covering up old stains, sealing porous surfaces, or simply refreshing the look, choosing the right paint is crucial for durability, safety, and aesthetics.
Table of Contents
This ultimate buying guide will walk you through the best paint options for your shower floor, what features to consider, and how to apply it for long-lasting results.
Why Shower Floor Paint Needs to Be Special
Not all paints can handle wet environments. A shower floor requires coatings that are:
- Fully waterproof or water-resistant
- Resistant to mildew and mold growth
- Durable under constant foot traffic
- Able to bond to tile, fiberglass, or concrete
- Ideally non-slip or texture-friendly
Using standard wall or floor paint in a shower will almost always fail quickly due to moisture penetration.
Types of Paint for Shower Floors
1. Epoxy Tile and Tub Paint (Best Overall Durability)
Epoxy-based coatings are the most durable option for shower floors.
Why it works:
- Chemically bonds to tile and porcelain
- Highly water-resistant
- Long-lasting finish
Best for: Heavy-use showers and long-term results
2. Acrylic Refinishing Kits (Best DIY Option)
Acrylic-based kits are easier to apply and more beginner-friendly.
Why it works:
- Simple 2-part mix system (paint + hardener)
- Good adhesion on tile, fiberglass, and sinks
- Affordable entry-level solution
Best for: Small bathroom updates and budget projects
3. Water-Based Floor Coatings (Best for Low Odor)
Water-based coatings are safer and easier to use indoors.
Why it works:
- Low VOC and low odor
- Good coverage (up to ~50–55 sq ft)
- Includes application tools in many kits
- Strong moisture resistance
Best for: Medium-to-large shower floor refinishing projects
4. One-Step Floor Paint Systems (Easiest Application)
These are designed for users who want minimal prep and fast results.
Why it works:
- No primer required
- Simple mix-and-apply system
- Self-leveling finish reduces brush marks
- Works on multiple surfaces (tile, vinyl, fiberglass)
Best for: Quick DIY refresh with minimal effort
Key Features to Look for in Paint For Shower Floor
1. Waterproofing Performance
Shower floors are constantly wet, so waterproofing is non-negotiable. Look for:
- Epoxy or acrylic resin base
- Mold and mildew resistance
- Strong adhesion to tile or fiberglass
2. Slip Resistance
Safety matters in wet environments.
Choose paints that:
- Allow anti-slip additives
- Dry with textured finishes
- Can be paired with grip additives
3. Durability & Adhesion
A good coating should not peel or bubble under constant moisture.
Best options:
- 2-part epoxy systems (highest durability)
- Reinforced acrylic kits (good mid-range durability)
4. Drying & Curing Time
Most shower floor paints:
- Dry in 24–48 hours
- Fully cure in 5–7 days
Avoid using the shower before full curing is complete.
5. Ease of Application
Consider your DIY skill level:
- Beginner: one-step kits
- Intermediate: acrylic refinishing kits
- Advanced: epoxy systems
Top 3 Best Paint for Shower Floor (Comparison Table)

Feature | DWIL Tub and Tile Refinishing Kit 33oz | Xmntdo Tub and Tile Paint Refinishing Kit 17.6oz | Jungarian One Step Interior Floor Coating Kit 35oz |
|---|---|---|---|
Best For | Medium–large bathroom renovations | Small DIY touch-ups | Quick one-step floor refresh |
Coverage | ~50–55 sq ft | ~25–30 sq ft | ~35 sq ft |
Paint Type | Water-based acrylic resin | Acrylic refinishing kit | One-step acrylic coating |
Finish Type | Semi-gloss white | Semi-gloss white | Semi-gloss |
Application System | Complete kit with tools included | 2-part kit (paint + hardener) | One-step mix (A + B components) |
Odor Level | Low | Low | Very low |
Dry Time | 24 hrs (7-day cure) | 24–48 hrs (7-day cure) | Fast drying, ~24 hrs cure |
Waterproofing | Very good | Good | Good |
Durability | Good | Moderate | Moderate |
Slip Resistance | Requires add-on | Requires add-on | Built-in film, moderate grip |
Ease of Use | Easy–moderate | Easy | Easiest (beginner-friendly) |
Included Tools | Full DIY kit (rollers, tape, gloves) | Basic tools included | Basic mixing/application tools |
Surface Compatibility | Multi-surface (tile, fiberglass, concrete, etc.) | Tubs, sinks, tiles | Multi-surface (vinyl, tile, fiberglass, etc.) |
Key Advantage | Best all-around coverage & kit completeness | Cheapest option | Simplest one-step application |
Main Drawback | Requires careful prep | Small coverage area | Less durable long-term |
Quick Take
- Best Overall: DWIL Tub and Tile Refinishing Kit 33oz – best balance of coverage, durability, and included tools
- Best Budget: Xmntdo Tub and Tile Paint Refinishing Kit 17.6oz – affordable and effective for small shower floor fixes
- Easiest to Use: Jungarian One Step Interior Floor Coating Kit 35oz – fastest and simplest application for beginners
Top 3 Best Paint for Shower Floor Reviews
1. DWIL Tub and Tile Refinishing Kit
The DWIL Tub and Tile Refinishing Kit 33oz is a versatile DIY solution for refreshing worn shower floors, bathtubs, and bathroom tiles without the need for a full renovation.
Designed for medium to large projects, it offers coverage of up to 50–55 sq ft, making it suitable for bathrooms, kitchens, and other high-moisture areas.
This water-based acrylic coating is formulated for durability, offering strong waterproof and anti-peeling performance once fully cured.
The semi-gloss white finish helps restore a clean, modern look to old surfaces, while the low-odor, low-VOC formula makes it more comfortable to use indoors compared to traditional solvent-based coatings.
This is a complete DIY kit, which includes rollers, brushes, gloves, masking materials, and sandpaper, everything needed for a full refinishing project. It dries relatively quickly, with full curing achieved in about 7 days.
Pros
- Large coverage area (50–55 sq ft)
- Complete DIY kit with tools included
- Low odor and low VOC formula
- Waterproof and anti-peeling finish
- Suitable for multiple surfaces (tile, concrete, fiberglass, etc.)
- Quick drying between coats
- Good value for medium renovation projects
Cons
- Requires careful surface preparation for best results
- Full curing takes up to 7 days
The DWIL Tub and Tile Refinishing Kit 33oz is an excellent option for homeowners looking to restore a shower floor or bathroom surfaces on a budget.
It delivers an easy-to-use, low-odor, and cost-effective way to achieve a refreshed, modern bathroom finish.
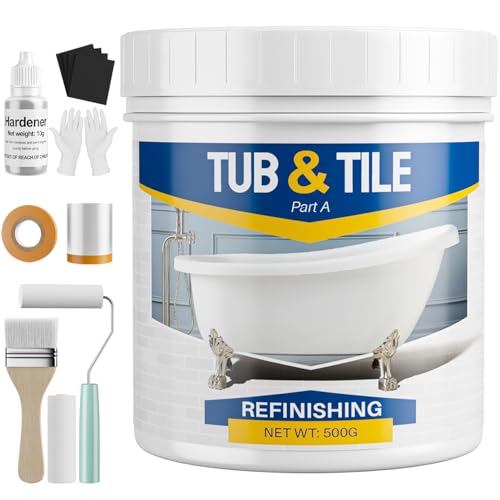
2. Xmntdo Tub and Tile Paint Refinishing Kit
The Xmntdo Tub and Tile Paint Refinishing Kit 17.6oz is a budget-friendly DIY solution for refreshing worn-out shower floors, bathtubs, and bathroom tiles.
Designed as an all-in-one refinishing kit, it includes paint, hardener, and basic tools, making it accessible even for beginners tackling small bathroom upgrades.
This acrylic-based coating is formulated for high-moisture environments and is designed to resist chipping, peeling, and flaking when properly applied.
The low-odor, low-VOC formula makes it more comfortable to use indoors compared to traditional epoxy systems, while still delivering a semi-gloss white finish that can noticeably improve the appearance of older surfaces.
It’s best suited for light restoration projects rather than heavy-duty commercial use. With proper surface preparation and curing time, it can provide a clean, refreshed look for shower floors, sinks, and tubs.
Pros
- Affordable DIY refinishing kit
- Includes tools and hardener for convenience
- Low odor and low VOC formula
- Easy to apply for beginners
- Works on tubs, sinks, tiles, and floors
- Noticeably improves old bathroom surfaces
- Dries within 24–48 hours
Cons
- Requires careful surface preparation
- Limited coverage (small areas only)
- Full curing takes up to 7 days
- May need reapplication over time
The Xmntdo Tub and Tile Paint Refinishing Kit 17.6oz is an excellent choice for DIY homeowners looking to quickly refresh a worn shower floor or bathtub without a full renovation.
It offers an easy, affordable way to restore bathroom surfaces with a clean, modern finish.
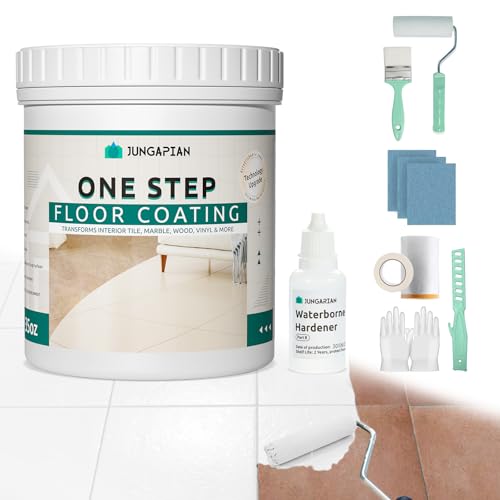
3. Jungarian One Step Floor Coating Kit
The Jungarian One Step Interior Floor Coating Kit 35oz is a convenient DIY solution for refreshing worn shower floors and other interior surfaces without the need for full replacement or complex refinishing systems.
Designed as a one-step coating, it simplifies the painting process by eliminating the need for separate primers or topcoats.
This water-based acrylic formula is low in odor and low in VOCs, making it suitable for indoor bathroom projects.
Once applied, it forms a durable, high-hardness protective layer that resists moisture, wear, and everyday foot traffic, ideal for ceramic, porcelain, fiberglass, vinyl, and similar surfaces commonly found in bathrooms.
The semi-gloss finish helps brighten old shower floors and tiles, giving them a cleaner, more modern appearance. It’s also designed to self-level, helping reduce visible brush marks for a smoother finish, even for beginners.
Pros
- One-step application (no primer or topcoat needed)
- Low odor and low VOC formula
- Strong adhesion to multiple surfaces
- Durable, high-hardness protective finish
- Easy DIY application for beginners
- Self-leveling for smoother appearance
- Suitable for shower floors and bathroom surfaces
Cons
- Requires careful surface prep for best results
- Limited long-term performance in heavy-use showers
The Jungarian One Step Interior Floor Coating Kit 35oz is a great, budget-friendly option for homeowners who want a quick, simple way to refresh a shower floor or bathroom surface.
It offers an easy-to-use, low-odor solution that can noticeably improve worn floors with minimal effort.
Step-by-Step Application Guide
Step 1: Clean the Surface
Remove:
- Soap scum
- Mold
- Oils and residue
Use a degreaser or vinegar-based cleaner.
Step 2: Sand or Etch the Surface
This improves paint adhesion and prevents peeling.
Step 3: Apply Primer (If Required)
Some epoxy systems require a bonding primer.
Step 4: Apply Paint
- Use even, thin coats
- Allow proper drying time between layers
- Avoid pooling water during application
Step 5: Add Slip-Resistant Top Coat
For safety, mix in or apply:
- Anti-slip grit
- Textured epoxy finish
- Polyurethane top coat
Common Mistakes to Avoid
- Using standard wall paint (will peel quickly)
- Skipping surface prep
- Not allowing full curing time
- Ignoring slip resistance
- Applying too thick a coat
Maintenance Tips
To extend the life of your painted shower floor:
- Clean regularly with non-abrasive cleaners
- Avoid harsh chemicals like bleach
- Reapply top coat every few years if needed
- Fix chips immediately to prevent water damage
Conclusion
The best paint for your shower floor depends on your surface type, usage, and preferred finish.
Whether you go for the durability of epoxy or the ease of acrylic urethane, the right choice can rejuvenate your bathroom and extend the life of your shower.
Just remember to follow the proper prep and application steps for long-lasting results.
Frequently Asked Questions
Can you really paint a shower floor, and is it safe?
Yes, you can paint a shower floor using specially formulated refinishing kits or waterproof floor paints. These products are designed to be moisture-resistant, non-slip, and durable enough to withstand daily use in wet environments, making them safe when properly applied and cured.
What type of paint should I use for a shower floor?
Use epoxy-based or acrylic enamel paints that are labeled as tub and tile refinishing kits. These are waterproof, chemical-resistant, and provide a tough finish that adheres well to ceramic, porcelain, and fiberglass surfaces.
How long does shower floor paint take to cure?
Cure times vary by product, but most paints require 24 to 72 hours to fully cure before exposing the surface to water. Always check the manufacturer’s instructions, as premature exposure can affect adhesion and durability.
How long will the painted surface last?
A properly applied and maintained paint job can last 3 to 5 years or longer, depending on usage, cleaning habits, and whether a protective topcoat was applied. Avoid harsh cleaners to prolong the finish.
Do I need to use a primer before painting a shower floor?
Some tub and tile kits come with built-in primers or do not require a separate one. However, if the surface is especially smooth or glossy, light sanding and a bonding primer are recommended to help the paint adhere better and last longer.